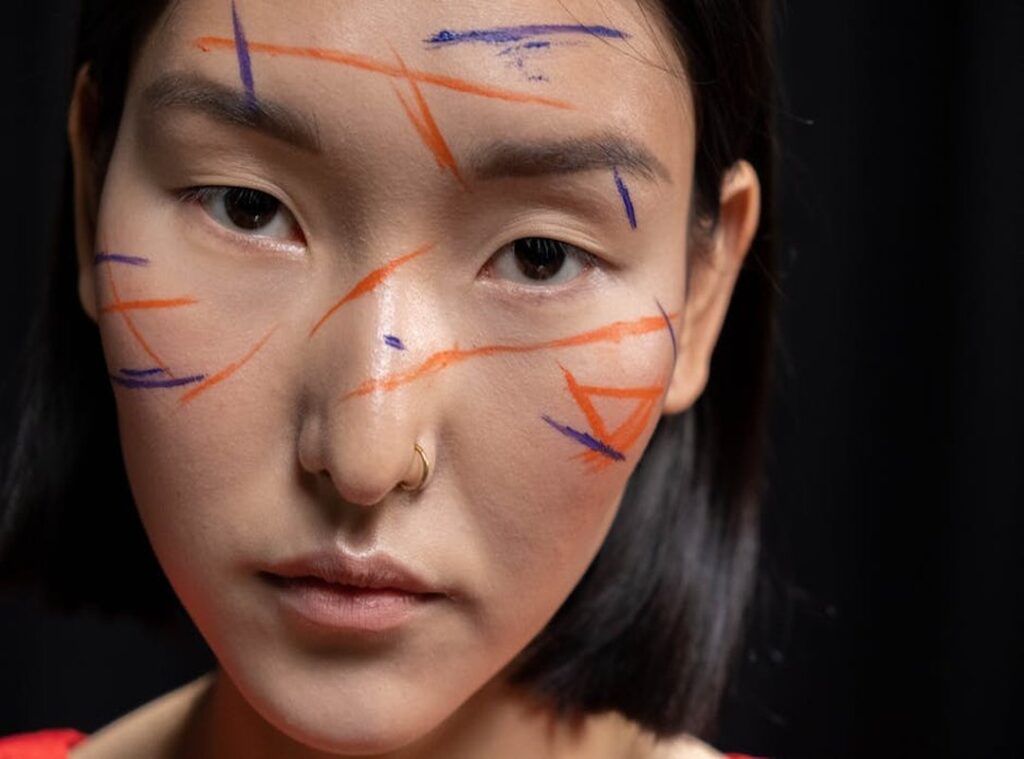
You want to boost your natural beauty, but let’s face it: the world of contouring can be overwhelming. Everyone seems to have a different method, and many treat contouring like a trend rather than an art. This leads to disappointing results.
I’ve spent years refining my understanding of facial artistry, talking to beauty experts, and figuring out what really works.
That’s why I’m here to guide you through contour art techniques that transform basic application into a sophisticated skill.
You deserve to sculpt your face with confidence and elegance.
This guide will help you understand contouring in a whole new light.
Every stroke will become a deliberate act of artistry.
I promise you’ll walk away with genuinely useful takeaways that raise your approach to beauty.
Get ready to open up the true potential of contouring. Your journey to mastering this art starts now.
Contouring: Sculptural Art on Your Face
Contouring isn’t just makeup. It’s a sculptural art method. Think of it like painting with light and shadow.
Artists have used chiaroscuro forever to craft depth on flat canvases. Now, imagine your face as that canvas.
Why does this matter? Because when you understand these artistic principles, your contouring game goes from basic to bespoke. It’s not just about slapping on some bronzer.
It’s about creating illusions of depth and dimension. You’re not just applying makeup; you’re shaping perception. Like sculpting in clay, every stroke matters.
Take a look at classical portraits. Notice how light and shadow play tricks on your eyes, creating form where there is none. That’s the essence of contour art techniques.
And it’s exactly what we’re doing with makeup.
Want a practical example? Check out this Sculpt Face Contouring Simple guide. It’s got the tips you need to start treating your makeup brush like a paintbrush.
Pro tip: Next time you’re contouring, think of it as shaping a masterpiece. Your face deserves that level of artistry. So, why settle for less when you can sculpt your look with precision?
The Golden Rules: Light and Shadow in Contouring
When it comes to contouring, the fundamental principle is simple: dark shades recede, light shades advance. This rule is the backbone of all contour art techniques. It doesn’t get more straightforward than this.
You want to create illusions, play tricks on the eye. Who doesn’t want that sculpted cheekbone look?
Now, identifying natural shadows and highlights on your face is key. Look under your cheekbones, along your jawline, and down the bridge of your nose. These are your prime contour spots.
Don’t forget the forehead and cupid’s bow. These areas are your roadmap.
Next up, shade selection. Contour shades should mimic natural shadows, so stick with cool-toned, matte products. Highlight shades should mimic natural light (think soft shimmer, lighter than your skin tone).
This is where people often mess up. Get it wrong, and you look like a painted doll. Get it right, and it’s magic.
Choosing shades for different skin tones can be tricky. For deeper skin tones, opt for deeper shades that are cool-toned. Lighter skin tones need softer colors.
Subtlety is key here. Harsh lines? Avoid them like the plague.
A slightly deeper, cool-toned shade under the cheekbone creates a sculpted effect. A luminous highlight on the high points brings them forward. It’s not rocket science, but it does take practice.
Remember, you’re enhancing what’s already there. Contouring isn’t about changing your face. It’s about enhancing it.
Pure and simple.
Important Contouring Art: Techniques and Tools for Precision
Let’s cut to the chase: contouring is an art. And like any art, the tools and techniques matter. You’ve got your cream/liquid contours and your powder contours.
Each has its perks, right? Creams are your go-to for that dewy, natural vibe. Dot and blend.
Simple. It’s like painting on a canvas (your) face.
For cream contouring, fingers, beauty sponges, or those dense synthetic brushes are your best pals. Keep the touch light. Tap, don’t swipe.
Blending is the name of the game, and the last thing you want is harsh lines (unless you’re going for the stage look, which I doubt).
Now, onto powder contours. They’re all about the layer and buff technique. We’re talking a soft, diffused finish.
Perfect for setting cream products or just rocking an everyday matte look. Angled contour brushes give you precision, while fluffy ones make blending smooth. It’s like knowing when to use a soft focus lens in photography.
Let’s talk application. Cheekbones? Think fish face.
It sounds silly, but hey, it works. Jawline needs a sweeping motion, and for the forehead, blend into the hairline. The nose requires fine lines for definition.
It’s all about those little details. The subtlety that makes contour art techniques really pop.
Remember, blending is where the magic happens. Blending is not just a step. It’s the step.
It turns lines into shadows and shadows into dimension. That’s the secret to a natural, luxurious finish. So, what’s your take?
Ready to transform your contour game?
Mastering the Contour: Crafting Art for Every Face
Let’s face it. One-size-fits-all contouring is a myth. Your face is the canvas, and understanding its shape is key to mastering contour art techniques.

Why? Because each face shape. Oval, round, square, heart, long (requires) a different approach.
First, how do you identify your face shape? Stand in front of a mirror. Look at the outlines.
Got it? Great. Now let’s break it down.
Oval Face
With an oval face, you’re blessed with balance. Boost it by defining cheekbones and temples subtly. Think of it as whispering, not shouting, with your brush.
Round Face
Round faces need angles. Add definition along the cheekbones and jawline to create length. It’s all about breaking the circle.
Square Face
Square faces can seem harsh if not softened. Focus on contouring along the temples and jawline. Soften those angles.
Trust me, it works.
Heart Face
Heart-shaped faces have wider foreheads and narrow chins. Balance this by contouring the temples and jawline. Aim for harmony.
Long Face
If your face is long, you want to visually shorten it. Contour along the hairline and under the chin. Simple tricks, big impact.
Remember, these are guidelines, not rules. Experiment. Find what feels right on your canvas.
And for a different kind of contour, explore blind contour drawing. It’s all part of the artistry.
Advanced Contour Art: Beyond Basics
Contouring isn’t just about the basics. It’s an art form. Ever tried reverse contouring?
It’s a game-changer. You brighten around your contour instead of darkening. Subtle lip contouring can give you that fuller look we all want.
But don’t forget about strobing. It’s all about highlighting without deep shadows to boost features naturally.
Now, let’s talk pitfalls. Ever ended up with a muddy contour? It’s usually poor blending or the wrong shade.
Harsh lines? Too much product or not enough blending. And looking like a ghost in different lighting?
That’s a recipe for disaster. The key to avoiding these? Natural lighting is your best friend.
Always check your work under it.
Practice makes perfect. Each application is a chance to refine your skills. Want more detail on contouring tips?
You can learn more. The world of contour art techniques is vast. Dive in and perfect your craft!
Master Your Contour Techniques
You’ve tackled the confusion of contouring. With these contour art techniques, you can sculpt and define like a pro. Don’t hold back.
Experiment with your unique features and transform your routine into an expression of artistry. Ready to raise your beauty game? Dive in and make every stroke count.
Your masterpiece awaits.
 Founder & Creative Director
Todd G. is the visionary founder of Zahongdos, a beauty-focused platform dedicated to spotlight stories, skincare education, makeup routines, and advanced aesthetic techniques. He leads the overall creative direction of the brand, shaping its identity around structured yet accessible beauty knowledge. His work focuses on turning complex beauty concepts into clear, practical systems that users can apply in daily routines. He also oversees editorial development, content strategy, and collaborations with industry experts. Through his leadership, Zahongdos blends trend awareness with educational depth. His long-term goal is to establish the platform as a global reference in beauty literacy and structured self-care systems.
Founder & Creative Director
Todd G. is the visionary founder of Zahongdos, a beauty-focused platform dedicated to spotlight stories, skincare education, makeup routines, and advanced aesthetic techniques. He leads the overall creative direction of the brand, shaping its identity around structured yet accessible beauty knowledge. His work focuses on turning complex beauty concepts into clear, practical systems that users can apply in daily routines. He also oversees editorial development, content strategy, and collaborations with industry experts. Through his leadership, Zahongdos blends trend awareness with educational depth. His long-term goal is to establish the platform as a global reference in beauty literacy and structured self-care systems.